
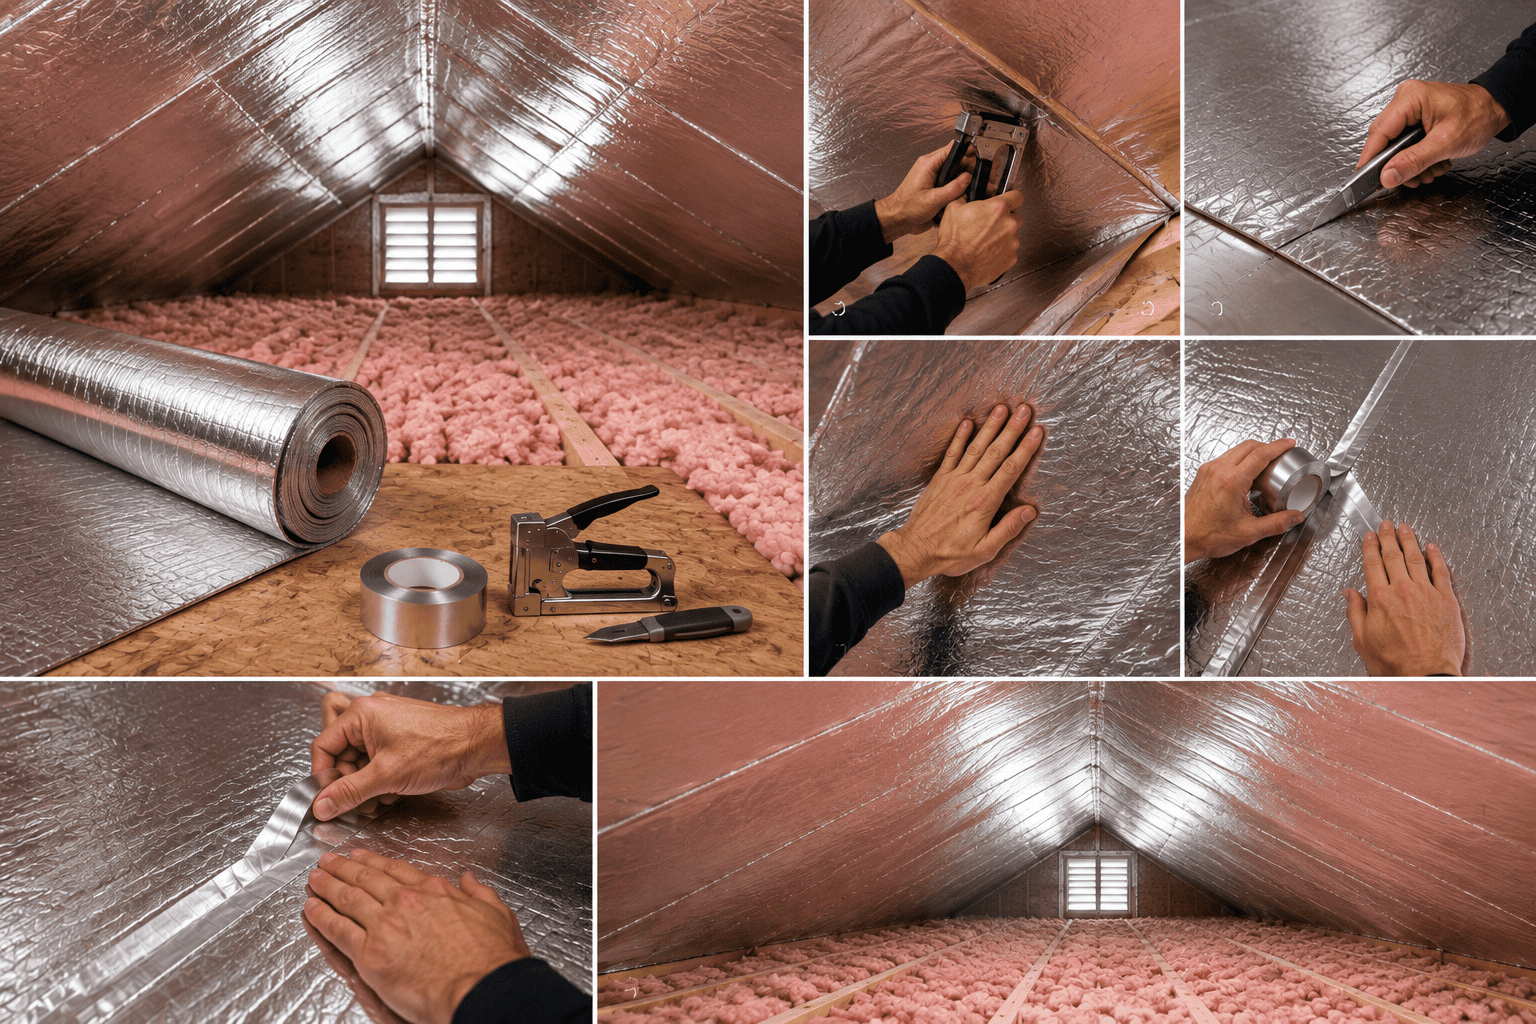
Yes, you can install radiant barrier yourself. For most attics and walls, it is a weekend project that needs basic tools — no special equipment, no professional crew, no messy chemicals. Here is how the process works for radiant barrier, reflective bubble, and reflective foam.
Step 1: Decide where to install
Start with the space you want to treat. Attics are the most common spot because a hot roof is the biggest source of radiant heat gain. Walls, crawlspaces, and floors also benefit depending on your climate and home design.
Step 2: Measure the area
Measure the length and width of each surface you plan to cover, then add a little extra for overlaps and trimming. Knowing your square footage tells you how much material to order, so you do not run short mid-project. If you need help, you can use our insulation square footage calculator.
Step 3: Cut to size
Cut the material with a sharp utility knife or heavy scissors. Measure each piece against the cavity you are filling, and cut slightly long so you can staple it snugly in place.
Step 4: Attach it
Fasten the material with staples, nails, or adhesive, following the manufacturer’s guidance for your specific product and surface. The key rule is that at least one reflective surface must face an air space.
For attic rafter installations: Start near the bottom of the rafters and work across the attic, fastening the radiant barrier to the face of the rafters. Maintain the required air space and do not block soffit, ridge, or other attic ventilation.
Step 5: Smooth it out
Pull the material into position as you go, keeping it reasonably flat and secure. Minor wrinkles will not affect performance, but a neat installation makes fastening, overlapping, and finishing the seams easier.
Step 6: Tape the seams
Cover the seams with metalized tape. This gives the finished job a clean look, and — just as important — it keeps air and moisture from leaking through the gaps between sheets
Step 7: Repeat for the next area
Work section by section until the whole space is covered. Taking it one bay or one wall at a time keeps the job manageable and the results even.
Safety Notes:
- Don’t cover recessed lights or heat-producing fixtures unless they’re rated for insulation contact.
- Keep required clearances around chimneys, flues, and other heat sources.
- Don’t block soffit/ridge ventilation.
- Be careful around exposed electrical wiring.
- In an attic, step only on framing or properly supported walking surfaces—not drywall.
- Avoid working in an attic during extreme heat.
Installing reflective insulation yourself is one of the fastest ways to cut your energy costs, because you skip the labor and pay only for material. Each of the products we sell is designed for this kind of DIY install. Browse our radiant barrier, reflective bubble, and reflective foam, or contact us if you want help picking the right product and quantity for your project.